Categories more
- Adventures (17)
- Arts / Collectables (14)
- Automotive (37)
- Aviation (11)
- Bath, Body, & Health (76)
- Children (6)
- Cigars / Spirits (32)
- Cuisine (16)
- Design/Architecture (22)
- Electronics (13)
- Entertainment (4)
- Event Planning (5)
- Fashion (45)
- Finance (10)
- Gifts / Misc (6)
- Home Decor (45)
- Jewelry (41)
- Pets (3)
- Philanthropy (1)
- Real Estate (16)
- Services (23)
- Sports / Golf (14)
- Vacation / Travel (59)
- Watches / Pens (14)
- Wines / Vines (24)
- Yachting / Boating (17)


Before-and-After Beauty Photos: How to Shoot Them Ethically and Consistently
Published
02/11/2026Before-and-after photos are powerful. They’re also fragile. In beauty, a small change in light, angle, lens, expression, or editing can make a result look dramatically better or worse than it truly is. That’s why before-and-after imagery lives in a tricky space: it can educate and build trust, or it can slide into accidental (or intentional) deception. Even well-meaning creators sometimes produce misleading comparisons without realizing it.
The good news is you can shoot before-and-after beauty photos ethically and consistently without turning your process into a scientific experiment. You just need a repeatable setup, clear rules, and an honest approach to what you’re showing and why. The goal isn’t to create a miracle transformation. The goal is to document real change in a way that viewers can understand and believe.
This guide covers how to plan your before-and-after photos, how to control variables like lighting and camera settings, what to disclose, how to edit responsibly, and how to create consistency across multiple shoots. Whether you’re a content creator, a skincare brand, a makeup artist, or someone documenting your own routine, these principles help you tell the truth beautifully.
Why Ethical Before-and-After Photos Matter
Beauty results often happen gradually. Skin texture improves over weeks. Hyperpigmentation fades over months. Hair health changes with consistent care. When someone sees a dramatic before-and-after, they make decisions: they buy a product, they book a service, they change their routine, they set expectations for what’s possible.
If the imagery is misleading, even unintentionally, it can:
- Create unrealistic expectations
- Erode trust when results don’t match
- Encourage overuse of products or procedures
- Harm your credibility long-term
Ethical before-and-after content is not “less effective.” It’s more effective over time because it builds a reputation for honesty. People can spot exaggeration. They may not know exactly how it’s done, but they feel it.
Start With the Golden Rule: Control the Variables
A before-and-after is only meaningful if the conditions are consistent. Your job is to keep everything the same except the thing you’re documenting.
The core variables to control:
- Lighting direction and intensity
- Camera distance and lens
- Angle and framing
- Facial expression and posture
- Background and wardrobe
- Makeup, skincare, and hair styling
- Editing and color correction
You don’t have to be perfect, but you should be intentional. The more consistent your setup, the more believable your comparison will feel.
Step 1: Decide What You’re Documenting and Over What Timeframe
Before you shoot anything, clarify what the “after” represents.
Examples:
- Makeup technique: immediate (before = bare face, after = finished makeup)
- Skincare results: weeks or months (before = day 1, after = week 8)
- Hair routine: weeks (before = baseline frizz or dryness, after = routine + trims)
- Cosmetic procedures: days to weeks (before = pre-treatment, after = healed result)
Ethical tip:
Be clear about time. “After 6 weeks” is a very different promise than “after one use.” If you’re documenting a professional treatment, specify whether the “after” is immediately post-treatment, after swelling, or after full healing.
Step 2: Build a Repeatable Setup (Your “Photo Booth”)
The easiest way to stay consistent is to create a simple, repeatable shooting station. You don’t need a studio. You need a reliable corner.
A basic setup:
- One primary light source (a window with indirect light is ideal)
- A consistent backdrop (a plain wall or a board)
- A consistent camera position (use a tripod or stable surface)
- A marker on the floor for where you stand or sit
If you use window light:
- Shoot at the same time of day whenever possible, because window light changes.
- Use a sheer curtain for diffusion so light stays soft and less variable.
- Avoid direct sun, which creates harsh shadows and changes quickly.
If you use artificial light:
- Use the same light at the same brightness and color temperature.
- Avoid mixing different types of bulbs, which can shift skin tone.
Pro move:
Tape a small mark on the floor for your feet and another for your tripod legs. That tiny effort creates big consistency.
Step 3: Use the Same Camera Settings Every Time
Phones are great for this because they’re consistent. But phone cameras also love to “help,” adjusting exposure and color without asking. That can change the look of skin tone, redness, and texture.
How to reduce variability:
- Use the rear camera rather than the front when possible, it’s often higher quality.
- Turn off beauty filters, skin smoothing, and portrait effects.
- Lock exposure and focus if your phone allows it.
- Use the same focal length: avoid switching between ultra-wide and normal, because wide lenses distort faces and can exaggerate or minimize features.
Distance matters:
If you take the “before” from closer and the “after” from farther away, the face shape and texture will look different. Pick a distance and stick to it.
A simple guideline:
Set your camera at about eye level and keep the same framing, for example from the top of the head to mid-chest for face/neck skincare or from the hairline to shoulders for hair results.
Step 4: Standardize the Human Variables: Pose, Expression, and Hair
A slight head tilt can change the appearance of cheekbones, jawline, and under-eye shadows. A smile can smooth lines. A serious expression can emphasize them. Hair pushed back can reveal texture. Hair down can hide it.
To keep things fair:
- Use the same facial expression, usually neutral.
- Keep the head position consistent: straight-on and one profile angle is a common approach.
- Keep hair styled the same way, especially around the face.
- Use the same clothing or a neutral top so the focus stays on skin.
If you’re documenting skin texture:
- Pull hair away from the face with a simple headband both times.
- Avoid using different hairstyles that change how light hits the face.
If you’re documenting hair:
- Style both “before” and “after” in the same way: both air-dried, both blow-dried, or both styled with the same tool.
- If the “after” includes heat styling or a professional blowout, disclose that clearly.
Step 5: Keep Skin Prep Honest and Consistent
Skincare before-and-afters can be dramatically influenced by hydration, exfoliation, shaving, or even how recently you washed your face.
A fair approach:
- Take photos at the same time relative to your routine, for example, clean face with no product, or moisturized face after 10 minutes.
- Avoid special prep for the “after” that you didn’t do for the “before” unless you disclose it.
- Be careful with heavy moisturizers or oils right before the “after” photo, they can create a plump, glossy look that mimics improvement.
If you want to show realistic daily life:
Take two sets of after photos:
- One “bare skin in the same conditions”
- One “real-life skin with your normal routine and makeup”
This gives viewers a truthful baseline and a practical context.
Step 6: Lighting Consistency Is Everything
Lighting is the biggest source of accidental exaggeration. Soft front light smooths texture. Side light emphasizes texture. Overhead light deepens under-eye shadows. A slightly darker photo can hide redness. A brighter photo can wash out pigmentation.
To keep lighting fair:
- Use the same light direction: if the window is on the left, keep it on the left every time.
- Use a consistent diffuser (sheer curtain) so the light doesn’t vary wildly.
- Avoid dramatic shadow patterns from blinds or trees.
- If possible, use a ring light or softbox at the same position for repeatability.
Ethical tip:
Don’t use harsh lighting for the “before” and flattering lighting for the “after.” Even if you think you’re “showing the difference,” you’re actually showing the power of lighting.
Step 7: Editing Rules That Keep You Honest
Editing is where ethics become visible. Some edits are normal and helpful. Others cross into deception.
Allowed edits that are generally ethical:
- Cropping and straightening
- Minor exposure correction if both images are adjusted equally
- White balance correction for accurate skin tone
- Light sharpening for clarity
- Removing background distractions that don’t affect the subject
Edits to avoid in before-and-after comparisons:
- Skin smoothing, blur, texture reduction
- Selective retouching of acne, pigmentation, scars, or under-eye areas
- Changing contrast or clarity differently between images
- Face slimming or feature reshaping tools
- Using filters that alter skin tone or texture
If you do any edits, the ethical approach is:
Edit both images with the same settings. If you adjust exposure, adjust it equally. If you correct white balance, correct it equally. Consistency is honesty.
Step 8: Disclose What Matters (Without Writing a Novel)
You don’t need a legal disclaimer page, but you do need to disclose anything that meaningfully affects results.
Examples of helpful disclosures:
- Timeline (after 8 weeks, after 3 sessions, after 1 use)
- Whether makeup is worn
- Whether lighting is the same setup
- Whether the after photo includes professional styling, tanning, or hair color
- Whether retouching was used (ideally, none)
- Whether results are typical or if individual results vary
A simple caption format that works:
Before: day 1, no makeup, window light, same camera setup
After: day 56, no makeup, window light, same camera setup
Routine: cleanser, moisturizer, sunscreen, retinol 3x/week
That’s enough for trust.
Step 9: Use Multiple Angles for Credibility
A single before-and-after can hide a lot. Multiple angles build transparency.
A strong set includes:
- Straight-on
- Left profile
- Right profile
- Optional: closer crop of the area you’re documenting (cheeks, under-eyes, jawline)
If you’re documenting hair:
- Back view
- Side view
- Close-up of ends and texture
Consistency across angles matters too. Use the same set each time.
Step 10: Think About Context, Not Just Transformation
Ethical beauty content respects that bodies and skin change day to day. Hormones, sleep, stress, hydration, and weather can affect results. If you’re documenting skincare, consider photographing multiple “after” days to show a range rather than a single best day.
This approach is especially helpful for acne, redness, and texture concerns that fluctuate. A single perfect after photo can feel like a promise. A range feels like reality.
Where Stock Imagery Can Fit In Ethically
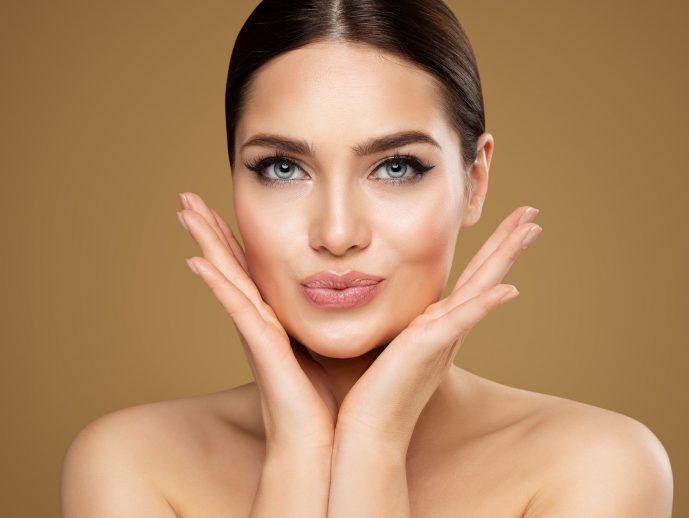
Before-and-after comparisons should always be your own original images of the actual subject. But supporting content around them can absolutely use professional stock photos in a positive, ethical way. For example, you can use stock imagery for blog headers, educational diagrams, lifestyle scenes, or background visuals that set the mood, as long as you don’t present them as evidence of results. When used transparently, stock photos can help you create polished content without confusing viewers about what is real documentation versus illustrative imagery.
A Practical Checklist for Ethical Before-and-Afters
Use this checklist before you publish:
- Same lighting direction and softness?
- Same camera distance and lens?
- Same angle and framing?
- Same expression and posture?
- Same background and clothing?
- Same makeup status (or clearly disclosed)?
- Same editing applied to both (or no editing)?
- Clear timeline and routine disclosed?
- No filters or skin smoothing?
- Multiple angles included when possible?
If you can check most of these boxes, your comparison is likely both honest and effective.
The Bottom Line
The most persuasive before-and-after photos aren’t the most dramatic. They’re the most believable. Ethical, consistent comparisons build trust because they respect the viewer’s intelligence. They show real change without relying on lighting tricks, selective editing, or conveniently different conditions.
If you’re a creator or brand, this approach also protects you. It reduces complaints, reduces skepticism, and builds a stronger relationship with your audience. In a world where people have learned to doubt what they see, clarity becomes a competitive advantage.
Shoot in the same spot. Use the same light. Keep the same angle. Avoid filters. Edit equally if you edit at all. Disclose what matters. And remember: consistency isn’t just a technical choice, it’s the ethics of the image.
Comments
