Categories more
- Adventures (17)
- Arts / Collectables (14)
- Automotive (37)
- Aviation (11)
- Bath, Body, & Health (77)
- Children (6)
- Cigars / Spirits (32)
- Cuisine (16)
- Design/Architecture (22)
- Electronics (13)
- Entertainment (4)
- Event Planning (5)
- Fashion (45)
- Finance (10)
- Gifts / Misc (6)
- Home Decor (45)
- Jewelry (41)
- Pets (3)
- Philanthropy (1)
- Real Estate (16)
- Services (23)
- Sports / Golf (14)
- Vacation / Travel (59)
- Watches / Pens (14)
- Wines / Vines (24)
- Yachting / Boating (17)


How to Build Your Own Terrarium
Published
04/06/2025Glass gardens are currently a popular trend in home decor throughout Britain.
These little green worlds in jars need barely any looking after and come with plenty of perks. They actively clean your air and bring a touch of the outdoors inside.
We will walk you through each step, from choosing the right components to picking plants that will thrive in your little habitat.
Installing one of these small gardens is a simple way to bring some greenery into your house and contribute to environmental conservation. They also look rather lovely—an absolute win-win!
Recognise the Science Behind Terrariums
Terrariums function as self-contained ecosystems that mimic the Earth's water cycle. Morning dew forms on glass walls as moisture evaporates, then drips back onto plants below.
This natural irrigation system explains why many enclosed gardens require minimal watering after initial setup.
Different biomes demand distinct approaches. For instance, desert arrangements need excellent drainage and infrequent hydration. On the other hand, tropical versions thrive with higher humidity and filtered light.
When creating woodland-inspired terrariums, a lush carpet of moss paired with fallen leaves and twigs works brilliantly as they break down gradually, feeding nutrients back into your miniature ecosystem.
The acidity of your soil plays a crucial role in plant health. Most indoor plants thrive in slightly acidic soil with a pH between 6.0 and 6.5. Hence, it is worth testing your compost mixture before assembling your glass garden.
You can easily tweak the pH if needed—a sprinkle of lime will raise the alkalinity. On the other hand, pine needles or a tablespoon of coffee grounds per cup of potting medium will increase acidity rather nicely.
Do consider the size of your container carefully, as it directly affects how often you will need to tend to your creation.
Larger glass vessels generally provide a more stable growing environment for your plants, though they do require a bit more thought when planning what goes where.
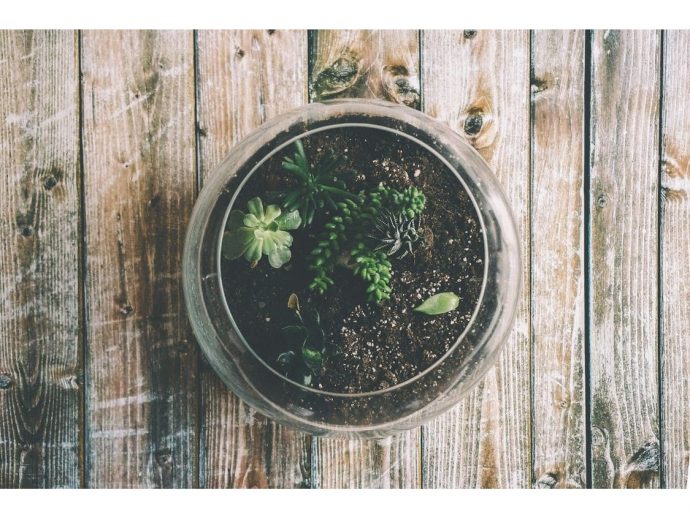
Choose the Right Container
Selecting an appropriate vessel is key for a flourishing display. You can explore clear glass options that allow ample light penetration.
Various choices exist, from classic bowls to sleek, modern designs.
Open containers work well for dry specimens like succulents by allowing air circulation. Closed ones better suit moisture-loving varieties like ferns, maintaining higher humidity levels.
Moreover, ensure your selected holder is tall enough for growth. Repurposing an old jar or vintage cloche adds a personal touch. Just verify there are no cracks to keep it leak-free and safe for your botanical collection.
Master Microclimate Creation
Strategically positioning elements creates distinct microclimates within your miniature world.
North-facing areas receive less light, ideal for shade-loving species. On the other hand, south-facing zones simulate sunnier conditions. In addition, height variations establish humidity gradients—lower areas retain moisture longer.
You can always introduce beneficial microorganisms by adding a teaspoon of established compost.
These invisible allies break down organic matter, releasing nutrients gradually. They also help prevent fungal diseases through competitive exclusion.
The resulting ecosystem becomes more resilient over time. To maintain this carefully balanced environment across the seasons, a few simple practices can make a difference.
Seasonal adjustments prove crucial for long-term success. Most arrangements benefit from slightly reduced watering during winter dormancy.
Just ensure you rotate your creation quarterly to prevent lopsided growth. Furthermore, prune aggressively in early spring to encourage bushier development when active growth resumes.
Select Suitable Greenery
A successful indoor arrangement depends on choosing appropriate flora that provides balance and aesthetic appeal.
Favour easy-care varieties that grow at manageable rates within restricted confines. Specimens such as succulents, ferns, and mosses make practical choices due to their compact nature.
Choose vegetation with similar lighting and water conditions to minimise maintenance. Flowering species typically demand more attention and may dominate the space.
Consider your arrangement's location and expected light exposure. Certain botanical specimens have specific illumination needs, potentially requiring supplemental artificial lighting if conditions are inadequate.
Assemble Materials and Layer the Base
Begin with high-quality organic potting soil rich in nutrients. Following that, add a gravel layer at the container base for proper drainage to prevent root rot.
For an attractive display with adequate drainage, begin with a thin foundation of gravel. This step prevents soil saturation. Add activated charcoal above this layer to absorb odours and inhibit mould formation.
Next, incorporate 5–8 cm of potting medium, ensuring sufficient depth for root establishment. Use a small tool to distribute each stratum carefully without mixing them.
Furthermore, consider light requirements when selecting placement, and use long-handled tools for precise placement in narrow containers.
Monitor moisture levels carefully as well, as enclosed environments retain water longer than traditional planters.
Likewise, keep instruments like spoons and tweezers handy for precise placement. Specialised gardeners often use the same tools for delicate plant care.
With these items prepared, assembly becomes a simple yet captivating activity. This approach maintains plant health while creating visual interest and balancing aesthetics and functionality.
Customise Arrangement
Before finalising placement, experiment with different configurations to visualise how your botanical specimens will interact. This practice allows adjustments for optimal balance and appearance.
Use fine-tipped tweezers for handling smaller varieties to prevent damage and maintain cleanliness. Moreover, ensure adequate spacing between plants for growth and air circulation.
Begin by establishing deeper-rooted species first, simplifying the process and ensuring systematic development. A coherent layout enhances visual appeal and promotes healthier growth through proper spacing.
Once the core arrangement is in place, you can further elevate the display by adding decorative elements.
Incorporate smooth stones, shells, or tiny figures for personal flair. Driftwood or coloured pebbles can complement the greenery beautifully.
Avoid overcrowding to leave space for growth, and periodically rotate the container so all plants receive equal light exposure. Thoughtful ornamentation contributes to a tranquil, natural ambience.
Overall, continue experimenting with various designs until you achieve harmony between functionality and aesthetics.
Your creation represents a miniature world that is both enjoyable to maintain and delightful to observe.
Ensure Your Creation Thrives
For optimal maintenance, carefully manage light and moisture conditions. Position your display where it receives gentle, indirect sunlight—perhaps on a windowsill with filtered light or in a partially shaded corner.
Excessive direct sunlight damages delicate foliage. When hydrating, especially in closed systems, use restraint. A dropper helps prevent oversaturation.
Trim overgrown specimens to prevent crowding. Monitor for pests or fungal growth in humid environments, addressing issues promptly. For persistent problems, consult professional gardeners.
Conclusion
Crafting miniature ecosystems offers an engaging activity that helps design a self-sustaining environment for your home.
This low-effort hobby provides ongoing satisfaction with minimal time investment. Beyond that, these small indoor habitats add visual interest to your surroundings and purify the air effectively.
They make wonderful gifts as well. If you develop skills in designing them, sharing your creations allows you to showcase your passion while bringing joy to others.
Comments
