Categories more
- Adventures (17)
- Arts / Collectables (14)
- Automotive (37)
- Aviation (11)
- Bath, Body, & Health (76)
- Children (6)
- Cigars / Spirits (32)
- Cuisine (16)
- Design/Architecture (22)
- Electronics (13)
- Entertainment (4)
- Event Planning (5)
- Fashion (45)
- Finance (10)
- Gifts / Misc (6)
- Home Decor (45)
- Jewelry (41)
- Pets (3)
- Philanthropy (1)
- Real Estate (16)
- Services (23)
- Sports / Golf (14)
- Vacation / Travel (59)
- Watches / Pens (14)
- Wines / Vines (24)
- Yachting / Boating (17)


Timeline for Building a Custom Timber-Frame Home
Published
11/24/2025Building a custom timber-frame home typically spans 10–18 months from your first sketch to move-in, so think of it as a marathon, not a weekend remodel. At Hamill Creek Timber Homes, we craft the exposed post-and-beam structure while simultaneously handling site planning, engineering, and panel fabrication. When you understand how these steps overlap—and exactly when milestones like the frame raising occur—you can budget confidently, avoid surprises, and actually enjoy the journey.
Phase 1: vision, budget, and site
Before sketches or spreadsheets, pause and picture daily life. Do you host big holiday dinners, work remotely, or crave indoor–outdoor flow? These lifestyle clues steer room count, circulation, and how the timber frame spans each space.
Next, walk the land with your designer or builder. Note solar exposure, prevailing winds, driveway access, and the view you want to frame with that first cup of coffee. A steep slope or a long utility run can add thousands in excavation or trenching, so capture those realities early.
Then talk real money. A traditional timber-frame or post-and-beam shell usually costs 15 to 20 percent more than a comparable stick-built structure. Recent cost guides from Hamill Creek Timber Homes, for example, put their timber frame kits and packages in roughly the 60 to 90 dollar per square foot range for the structural shell, with many turnkey timber-frame homes ending up around 250 to 500 dollars per square foot once foundations, mechanical systems, and finishes are included. Whatever numbers you use, add design and engineering fees of about 8 to 10 percent of construction cost, and keep a 10 percent contingency for surprises such as rock blasting or a deeper well.
Key actions for this phase:
- Align lifestyle goals with square footage and volume.
- Document site constraints—grade, soil, easements, and access.
- Request preliminary budgets for both timber-frame and conventional options, plus a line item for contingencies.
When vision, land realities, and budget line up, you’re ready for concept design.
Phase 2: conceptual design

With the fundamentals in place, the design team shifts from ideas to sketches you can hold. Over the next 3–4 weeks (the American Institute of Architects’ typical window for a two-person schematic phase), you’ll cycle through several big-picture iterations before anyone worries about doorknobs.
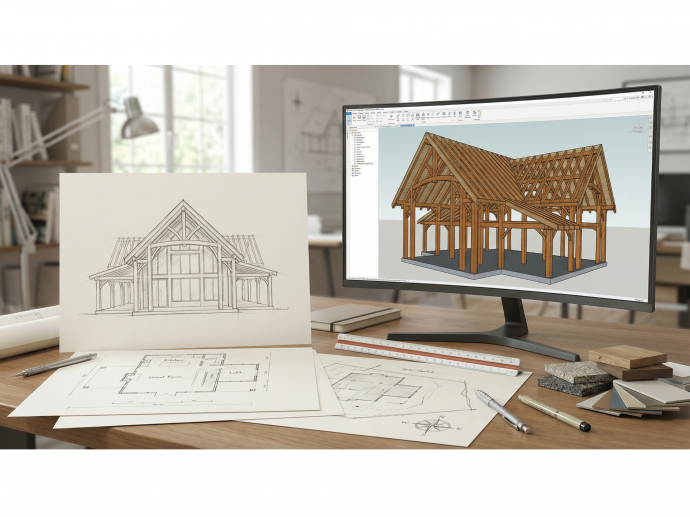
First comes a site concept that positions the house for sunlight, breeze, and that postcard view through the great-room gable. A floor-plan sketch follows, blocking out room sizes, traffic flow, and how the loft might overlook the timber-framed great room. Finally, the team drafts a timber-frame concept: truss shapes, beam spacing, and the ceiling heights those structural choices unlock.
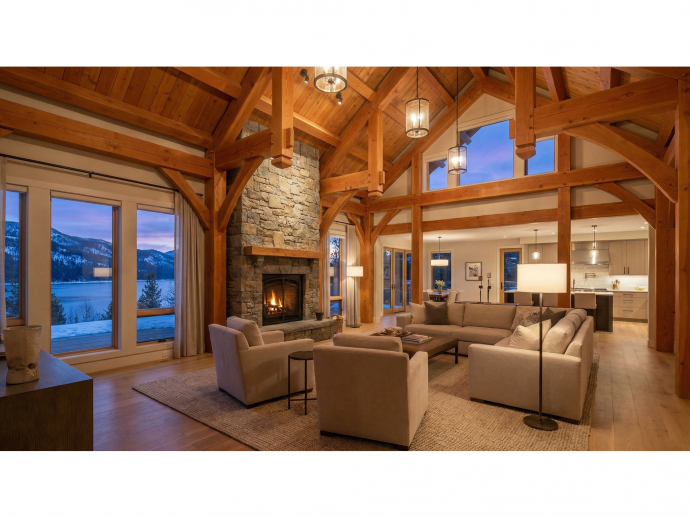
Plan on two or three rounds of refinement: single-story versus two-story, keeping the loft or choosing a walk-out basement, deciding whether a double-height stone fireplace should anchor the view wall. Because the frame stays exposed, every tweak affects structure and aesthetics at once, so this is the moment to test bold ideas while sketches are still affordable.
By the end of conceptual design, you’ll have a plan that feels right in both head and heart, plus a realistic cost range to carry into detailed engineering.
Phase 3: detailed design and engineering
With the concept locked, your timber-frame home shifts from broad strokes to decimal points. Over roughly six to ten weeks (the window Fine Homebuilding notes for turning schematics into permit-ready documents), the team layers structure, systems, and finishes into one coordinated model.
- Structural and shop drawings. A licensed engineer sizes every post, beam, and connector, while the timber shop produces joinery files that guide CNC cutters. Structural-engineering fees usually land at 1–3 percent of construction cost.
- MEP integration. Mechanical, electrical, and plumbing lines weave through the 3-D frame so ducts never collide with tie beams.
- Material specifications. You’ll pick species and stain for the frame, window ratings, roofing profiles, and any feature that affects load, such as a two-story stone hearth.
- Permit and pricing set. Architects’ full-service fees run 8–15 percent of the build budget, and this deliverable is where that investment pays off: a stamped package ready for permitting, fabrication, and accurate contractor bids.
By the end of Phase 3, every joint, wire, and weather barrier lives in one drawing set, your blueprint for a smooth raise and a predictable budget.
Phase 4: timber fabrication and site preparation
While drawings turn into sawdust, two tracks run in parallel. In the shop, joiners cut, sand, and test fit your timber frame, a process that takes about four to six weeks for an average-size home. Out on site, your contractor excavates, pours footings, and roughs in utilities; according to Timberbuilt, you should budget six to ten weeks from the first bucket of concrete to the crew’s arrival with finished timbers, allowing for weather and inspections.
Because these tasks overlap, the schedule shrinks: your handcrafted frame rolls off the truck as soon as the foundation cures, not weeks later. Many owners plan a shop visit during fabrication to sign a beam or watch the first mortise come together; it’s an unforgettable preview of what will soon rise on site.
Phase 5: raising the frame and enclosing the shell
Big trucks roll in, the crane stands ready, and the timber-frame home you’ve only seen on paper starts climbing toward the sky. For a typical 2,500-square-foot frame, crews need just six to ten days to unload, assemble, and deck the structure before attaching wall and roof panels, according to Timber Frame Magazine. Choose structural insulated panels (SIPs) and that window shrinks even more; an RS Means study cited by SIPS.org shows SIP installation trims framing labor by 55 percent compared with stick framing.
After the last truss is pegged, the crew “button-ups” the envelope with SIPs or conventional sheathing and insulation, turning an open skeleton into a weather-tight shell in roughly one more week. Now you can walk through real rooms, gauge ceiling height under those exposed beams, and watch the great room frame your view.
Phase 6: mechanical systems and finishes
With the shell locked up, your timber-frame home starts feeling less like a construction site and more like a house. Over the next four to six weeks, subcontractors rough in the big three systems—plumbing, HVAC, and electrical—before city inspectors sign off on their work, according to Timber Home Living. National cost breakdowns from Home Builder Digest show mechanical installations absorbing about thirty-thousand to one-hundred-forty-thousand dollars on a 2,500-square-foot custom build, while interior finishes can run seventy-three-thousand to three-hundred-thirty-thousand dollars depending on material grade.
Because the frame stays exposed, electricians notch conduit behind posts, plumbers route vents through chase walls, and drywall crews float seams around tapered beam pockets. Clear communication between the timber team and each trade keeps saw blades and fasteners away from decorative joinery.
After inspections pass, the rhythm shifts to craft: drywall and paint, hardwood floors, tile, cabinetry, and the trim that ties timber, wall, and window together. Outside, siding, stone, decks, and landscaping wrap the project in its final skin. When the last coat of finish cures on the posts, you’ll see the warm glow that drew you to timber framing in the first place.
Phase 7: punch list and move-in
When your timber-frame home looks finished, the job isn’t quite done. About ten days before the agreed completion date, you and your builder walk every room with blue tape in hand, flagging scuffs, missing hardware, or a door that needs an extra hinge tweak. Most custom teams aim to clear that punch list within the same ten-day window.
While crews touch up paint and adjust cabinet doors, the HVAC tech commissions the system, and electricians run a final arc-fault test so you know each breaker’s job. Once all required inspections pass, many jurisdictions issue a certificate of occupancy within a few business days; for example, the City of Phoenix generates it automatically after final sign-off.
Conclusion
Paperwork in hand, you can roll out rugs, light the first fire, and watch those handcrafted beams glow as the house finally becomes home.
Comments
