Categories more
- Adventures (62)
- Arts / Collectables (14)
- Automotive (77)
- Aviation (65)
- Bath, Body, & Health (123)
- Children (6)
- Cigars / Spirits (71)
- Cuisine (66)
- Design/Architecture (22)
- Electronics (63)
- Entertainment (36)
- Event Planning (115)
- Fashion (45)
- Finance (10)
- Gifts / Misc (6)
- Home Decor (118)
- Jewelry (41)
- Pets (3)
- Philanthropy (1)
- Real Estate (16)
- Services (44)
- Sports / Golf (14)
- Vacation / Travel (85)
- Watches / Pens (33)
- Wines / Vines (34)
- Yachting / Boating (67)



Upgrading to Heat Pumps for Better Home Efficiency

Published
08/14/2026Why Upgrade to a Professional Heat Pump Installation?
As temperatures rise, maintaining a comfortable home becomes a priority. While addressing immediate cooling issues is essential, it's also worth considering long-term solutions for enhanced home efficiency. Heat pumps offer a compelling upgrade for many homeowners, especially in the diverse climate of the Bay Area. These systems provide both heating and cooling in one energy-efficient unit, making them a versatile choice for year-round comfort. Modern heat pumps boast impressive Seasonal Energy Efficiency Ratio (SEER) ratings, indicating their ability to cool your home effectively with less energy consumption compared to traditional AC units. This translates to lower utility bills and a reduced carbon footprint, aligning with the growing demand for sustainable living in our communities.
Preparing Your Home for a Heat Pump Installation
Before a heat pump installation, a thorough home assessment is crucial. This involves evaluating your home's insulation, window efficiency, and overall energy envelope to ensure the new system operates at peak performance. Our team will also inspect your existing electrical panel to confirm it can support the new heat pump's power requirements, making any necessary upgrades. Ductwork inspection is another vital step; properly sealed and sized ducts are essential for efficient air distribution. Additionally, we will evaluate your home's microclimate and orientation. Homes in the Bay Area often experience microclimates where one side of the house receives intense afternoon sun while the other remains shaded and cool. Understanding these temperature variations helps us determine the ideal placement for indoor air handlers and zone sensors, ensuring balanced comfort throughout the entire living space. We also take into account local noise ordinances when selecting the outdoor unit's location, as modern heat pumps are exceptionally quiet but still require strategic placement to minimize any sound transmission to neighboring properties. Finally, we'll assess space requirements for both the outdoor condenser unit and the indoor air handler to ensure a seamless and aesthetically pleasing installation.
What to Expect During a Professional Heat Pump Installation
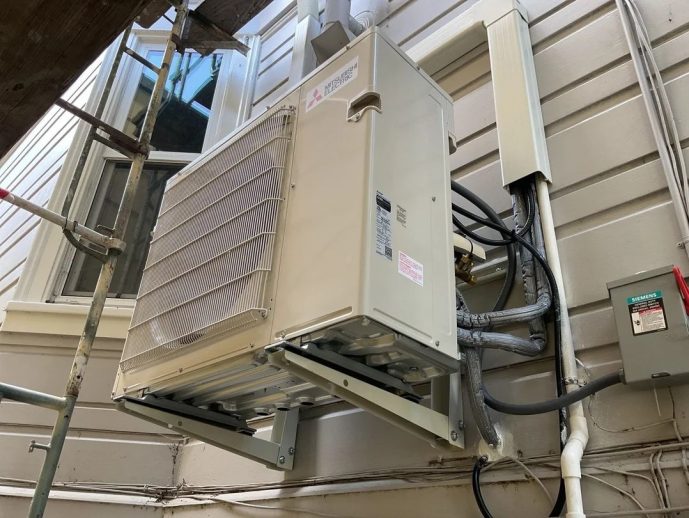
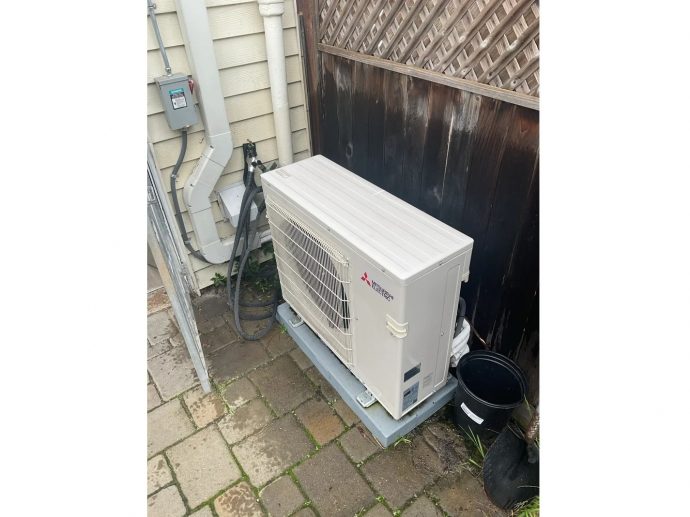
When you choose a professional heat pump installation, you can expect a streamlined process. Our certified technicians will begin by carefully mounting the outdoor unit in an optimal location, ensuring proper airflow and accessibility for future maintenance. The indoor air handler, which distributes conditioned air throughout your home, will be expertly integrated into your existing system or installed in a new, suitable spot. Refrigerant lines will be meticulously run and connected, and all electrical components will be wired according to safety codes. The final stage involves comprehensive system testing and calibration to verify that your new heat pump is operating efficiently, providing consistent heating and cooling, and meeting all manufacturer specifications. Once the physical installation is complete, our technicians don't just pack up and leave. We conduct a thorough walkthrough with you to explain how to operate your new system, program the thermostat for maximum efficiency, and understand the transition between heating and cooling modes. We will also discuss the simple maintenance tasks you can perform yourself, such as regular filter changes, and outline a recommended professional maintenance schedule to keep your manufacturer warranty fully valid and protect your investment for years to come.
Troubleshooting Cooling Issues and Verifying System Performance
Even with the best systems, occasional cooling issues can arise. Understanding basic system diagnostics can help you identify common problems, saving you time and potentially preventing unnecessary service calls. Before diving into more complex issues, always start by checking your thermostat settings and air filters. Many cooling failures stem from these simple oversights. For more in-depth guidance on maintaining optimal comfort, you might find additional resources on indoor air quality services helpful, as they often touch upon related system performance checks.
Simple DIY Checks for Airflow and Thermostat Settings
When your AC isn't cooling properly, start with the basics. First, check your thermostat. Ensure it's set to "Cool" mode and that the setpoint temperature is lower than the current room temperature. If your thermostat runs on batteries, replace them, as low battery power can cause erratic behavior. Next, inspect your air filter. A dirty air filter is one of the most common culprits for poor AC performance. A clogged filter restricts airflow, forcing your system to work harder and reducing its cooling capacity. Replace it if it appears dirty. Finally, walk around your home and check all supply and return vents. Make sure they are not blocked by furniture, curtains, or other obstructions, as blocked vents can severely impede airflow and cooling efficiency.
Inspecting Coils, Vents, and Outdoor Units
Beyond the filter, inspect your system's coils. The outdoor condenser unit, which dissipates heat from your home, can become covered in dirt, leaves, and other debris. This buildup acts as an insulator, preventing the unit from releasing heat effectively. Carefully clear away any debris from around the unit and gently rinse the coils with a garden hose (ensure the power is off first). Inside, the evaporator coils, located in your indoor unit, can also get dirty or, worse, freeze over. If you notice ice on these coils, it often indicates a severe airflow problem (like a very dirty filter) or a refrigerant issue. Turn off your AC and run the fan-only mode to allow the ice to melt before further troubleshooting.
What to Check When Your System Won't Turn On
If your AC isn't turning on at all, the problem might be electrical or a safety mechanism. Start by checking your circuit breaker panel. Locate the breaker labeled for your AC or furnace and ensure it hasn't tripped. If it has, reset it. Also, check for any disconnect switches near your outdoor unit or indoor furnace; these should be in the "on" position. Many furnaces or air handlers have a safety switch on the access panel door; ensure the door is securely closed. A clogged condensate drain line can also trigger a safety switch, shutting down the unit to prevent water overflow. Check the drain pan for standing water and the drain line for blockages.
How to Verify If Your Current Air Conditioner is Actually Cooling
To truly determine if your AC is cooling, you can perform a simple temperature differential test. This involves measuring the temperature of the air entering your return vents and comparing it to the temperature of the air coming out of your supply vents. Place a thermometer in a return vent for a few minutes, then move it to a supply vent. A properly functioning AC system should show a temperature difference of about 16-20 degrees Fahrenheit between the return and supply air. If the difference is significantly less, your system isn't cooling effectively.
Another visual check is to inspect the larger, insulated refrigerant line (the suction line) that connects your outdoor unit to your indoor unit. When the AC is running, this line should feel cold to the touch and often have some condensation on it. If it's warm or dry, it could indicate a problem. Also, observe the condensate drain line; it should be dripping water during operation, a sign that your AC is effectively removing humidity from your home.
Indicator Normal Operation Abnormal Operation What it Means Temperature Differential 16-20°F drop (supply vs. return air) Less than 16°F drop Poor cooling efficiency, airflow issues, or low refrigerant. Refrigerant Line Cold and sweating (insulated suction line) Warm or dry Low refrigerant, compressor issue, or restricted flow. Condensate Drain Steady drip of water No drip or overflowing pan Clogged drain line, high humidity, or unit not running long enough. Outdoor Unit Air Hot air blowing from the top No hot air, or unit not running Compressor or fan issue, electrical problem. When to Transition to a New Heat Pump System
While DIY troubleshooting can resolve many minor issues, there comes a point when repairing an old AC unit becomes less cost-effective than upgrading. Several indicators suggest it might be time to transition to a new heat pump system. Persistent compressor failure, the heart of your cooling system, is a major red flag. If your outdoor fan motor is constantly failing or making unusual noises, it signals significant wear and tear. Frequent refrigerant leaks not only harm the environment but also point to an aging system with compromised components.
Furthermore, if your home’s cooling problems stem from improper installation of your current AC or leaky air ducts, a new heat pump installation provides an opportunity to correct these foundational issues. A professional HVAC technician can assess your existing system's efficiency and reliability, helping you determine if continued repairs are a band-aid solution. Investing in a new heat pump ensures you benefit from modern energy efficiency, improved comfort, and long-term savings, rather than pouring money into an outdated system.
Additionally, transitioning to a heat pump can make you eligible for substantial financial incentives. Under the federal Inflation Reduction Act (IRA), homeowners can claim significant tax credits for installing energy-efficient heat pumps. Local utility companies in the Bay Area also offer rebates and incentives that can dramatically lower the upfront cost of your upgrade. When you combine these immediate savings with the ongoing reduction in your monthly energy bills, the return on investment for a new heat pump system becomes highly compelling, making it a financially savvy decision for the modern homeowner.
Frequently Asked Questions About Heat Pumps and Cooling
Why is my AC running but not lowering the temperature?
This is a common frustration. Often, the culprit is a dirty air filter severely restricting airflow. Other reasons include a blocked outdoor condenser unit preventing heat dissipation, low refrigerant levels due to a leak, or an undersized AC unit that simply can't keep up with your home's cooling demands.
How can I tell if my AC's compressor or outdoor fan motor is bad?
If your outdoor unit is shaking excessively, making loud grinding or buzzing noises, or if the fan isn't spinning even though the unit is powered on, these are strong indicators of a failing fan motor. If the unit is running but only blowing warm air, it often points to a compressor issue or a significant refrigerant problem.
What are the signs of a refrigerant leak and what should I do?
Signs of a refrigerant leak include a hissing sound near your indoor or outdoor unit, ice forming on the evaporator coils, or your AC blowing lukewarm air despite running continuously. Refrigerant leaks require immediate attention from a professional technician. Refrigerant is a chemical that should only be handled by certified experts, as mishandling can be dangerous and harmful to the environment.
Conclusion
Addressing an AC that's not cooling properly can range from simple DIY fixes to considering a complete system upgrade. By understanding what to check and when to call in the experts, homeowners in the Bay Area can maintain optimal home comfort and make informed decisions about their HVAC systems. Whether you're troubleshooting a minor issue or exploring the long-term benefits of a new heat pump, prioritizing energy efficiency and reliable performance ensures your home remains a sanctuary, even when the heat is on.
Comments
