Categories more
- Adventures (17)
- Arts / Collectables (14)
- Automotive (37)
- Aviation (11)
- Bath, Body, & Health (77)
- Children (6)
- Cigars / Spirits (32)
- Cuisine (16)
- Design/Architecture (22)
- Electronics (13)
- Entertainment (4)
- Event Planning (5)
- Fashion (45)
- Finance (10)
- Gifts / Misc (6)
- Home Decor (45)
- Jewelry (41)
- Pets (3)
- Philanthropy (1)
- Real Estate (16)
- Services (23)
- Sports / Golf (14)
- Vacation / Travel (59)
- Watches / Pens (14)
- Wines / Vines (24)
- Yachting / Boating (17)


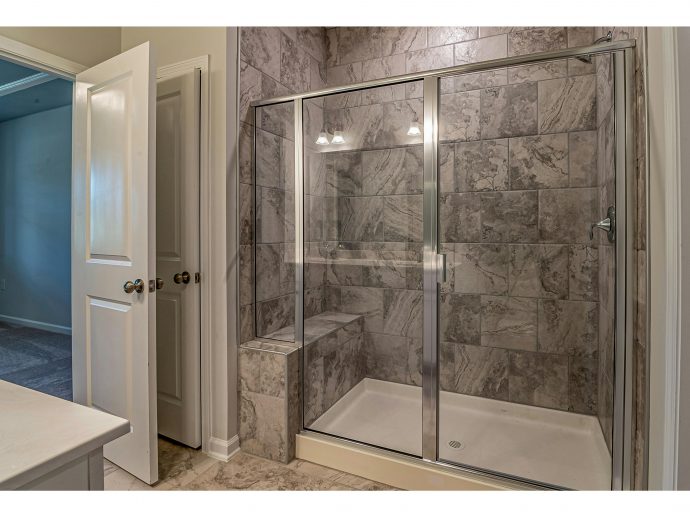
What to Ask Your Installer Before a Custom Shower Door Goes In
Published
03/18/2026A custom shower door looks deceptively simple: a clean sheet of glass, a couple of hinges, a handle, and you’re done. In reality, it’s one of the most precision-dependent parts of a bathroom build. Tile can be forgiving; glass is not. If something is out of plumb by even a little, the door may swing open on its own, leak at the edges, or bind at the corner.
Before your installer shows up with glass, it’s worth having a short, practical conversation—less “sales consult,” more “jobsite alignment.” The right questions will tell you whether your shower is ready, what risks exist, and how the installer plans to manage them.
Start With the Site Conditions (Not the Style)
Is the shower actually “ready for glass”?
Many installation issues begin earlier in the project. Ask the installer what they need to see before they’ll schedule the final install. A thorough pro will look for:
- Tile fully set and grouted (not still curing)
- Waterproofing complete and uncompromised
- Threshold/curb finished, not “we’ll touch it up later”
- No wavy walls where the glass will seal
If you’re mid-renovation, confirm who is responsible for calling “glass-ready.” In well-run projects, the tile setter and glass installer coordinate so measurements happen at the right moment—not when the walls are still moving.
How out-of-plumb or out-of-level can the opening be?
Here’s a question that immediately separates experienced installers from box-checkers: “What tolerances can you work with, and what happens if the opening is out?”
Good installers will explain what can be corrected with hardware adjustments, what needs a custom cut, and what requires a construction fix (like reworking the curb). If the answer is essentially “we’ll make it work,” ask follow-ups. Glass doesn’t “make it work” the way wood trim does.
Where will the water go?
A shower door isn’t just a barrier; it’s part of the water-management system. Ask:
- Will the curb slope back into the shower?
- Where will the sweep and seals sit?
- Is a drip rail needed for this layout?
If you’re doing a door-and-panel configuration, small choices—like whether the fixed panel sits on the curb or inside it—can change how much water you’ll chase with a towel later.
Clarify the Measurement and Installation Process
When do you template or measure—and what are you measuring from?
Templating after tile is standard for true custom glass, but the important part is what plane the installer is using: tile face, grout lines, or another reference. If your tile has heavy texture or a handmade surface, that can affect sealing and measurement accuracy.
Ask whether they’ll take diagonal measurements and check for twist (not just width and height). Twisted openings are a common reason doors don’t hang cleanly.
Walk me through the install day: what happens first?
You’re not trying to micromanage; you’re trying to prevent surprises. A solid overview should cover protection, layout, drilling, hanging, sealing, curing time, and final adjustments. If you want a quick, plain-English primer before you get into the weeds, this explainer on what’s involved in shower door setups is a helpful reference point for the typical sequence and what to expect.
Also ask how long the bathroom will be out of service. Silicone cure times vary, and some installers prefer you not use the shower for 24 hours (or longer) depending on humidity and the type of sealant.
Who is responsible if something doesn’t fit?
This is an important (and sometimes awkward) question, so ask it early. If the opening changes after measurement—say the tile contractor adds a layer of mortar, or a curb cap gets replaced—there can be re-fabrication costs. A reputable installer will be clear about:
- What’s included in the measurement/template
- What site changes trigger re-measurement fees
- What happens if glass arrives and conditions aren’t as agreed
Get Specific About Glass, Hardware, and Safety
What glass thickness is appropriate for this design?
Thicker isn’t always “better,” but it can be more stable in certain configurations. Your installer should justify the recommendation based on panel size, door width, hinge type, and whether there’s a stabilizer bar.
Ask what type of safety glass is being used (tempered is typical) and whether any local codes apply. If you’re in a condo building, it’s also worth confirming if the building has rules about thickness or hardware finishes.
What hardware layout are you using, and why?
A frameless door’s performance depends heavily on hinge placement and anchoring. Ask:
- How many hinges will the door have?
- Are you anchoring into studs, blocking, or specialty anchors?
- Will any hardware penetrate the waterproofing layer?
You want the installer to talk confidently about backing and structure. If they’re unsure what’s behind the tile, pause the project until that’s clarified. “We’ll just use heavy-duty anchors” is not a plan; it’s a gamble.
Are we using a coating, and how does it change maintenance?
Protective glass coatings can reduce spotting, but they’re not magic. Ask what cleaning routine the installer recommends and what products to avoid. Some coatings don’t play well with abrasive pads or harsh chemicals, and the wrong cleaner can leave a haze that looks like permanent staining.
Discuss Seals, Leaks, and Real-World Expectations
Where is the door supposed to be watertight—and where is it not?
This is the question homeowners often forget to ask. Many frameless setups are designed to be water-resistant, not aquarium-tight. A good installer will explain typical splash zones, what seals are included, and what gaps are normal (especially around hinges).
If you have a rain head, body sprays, or a handheld aimed toward the door, mention it. Water behavior changes dramatically with fixture placement and pressure.
What are the most common leak points in this layout?
You’re looking for specifics: bottom sweep alignment, curb slope, hinge-side gaps, or out-of-square corners. If they can’t name common failure points, they may not have installed enough doors to have learned the hard lessons.
Nail Down Logistics: Timeline, Protection, and Warranty
How should I prepare the space?
You shouldn’t have to guess what “ready” means. Ask whether you need to clear vanities, remove rugs, protect nearby stone, or provide parking access. Glass handling is careful work, but it’s still construction—dust and tools happen.
What warranty do you provide, and what voids it?
Don’t settle for “it’s covered.” Ask what’s covered (hardware finish, hinge function, seals, labor) and what isn’t (improper cleaning, misuse, building movement). Also ask who you call if the door starts sagging or rubbing six months later—because small adjustments are common as homes settle.
A Simple Pre-Install Question List (Use It Once, Save Headaches Later)
If you want a quick way to run the conversation, here’s the tight version:
- Is the opening plumb/level enough, and what must be fixed before install?
- When do you measure/template, and what site conditions are required?
- How will the hardware be anchored (studs/blocking/anchors)?
- What seals are included, and what level of water containment is realistic?
- What’s the cure time before the shower can be used?
- What warranty applies to glass, hardware, and labor?
A custom shower door is one of those finishing touches that reveals whether the planning was thoughtful. Ask the right questions now, and you’ll get the payoff later: a door that closes cleanly, sheds water sensibly, and still looks sharp years down the line.
Comments
