Categories more
- Adventures (177)
- Arts / Collectables (193)
- Automotive (183)
- Aviation (244)
- Bath, Body, & Health (422)
- Children (83)
- Cigars / Spirits (206)
- Cuisine (566)
- Design/Architecture (305)
- Electronics (181)
- Entertainment (134)
- Event Planning (266)
- Fashion (419)
- Finance (121)
- Gifts / Misc (107)
- Home Decor (434)
- Jewelry (266)
- Pets (61)
- Philanthropy (75)
- Real Estate (285)
- Services (180)
- Sports / Golf (167)
- Vacation / Travel (895)
- Watches / Pens (174)
- Wines / Vines (688)
- Yachting / Boating (231)



A 2026 Homeowner’s Checklist for Excavation, Drainage, and Utility Work

Published
08/10/2026Key Takeaways
- Walk the property and document existing conditions before soil is disturbed.
- Confirm utility locations, permits, access routes, and property restrictions early.
- Plan grading and drainage together so water moves away from structures.
- Review quotes for hauling, disposal, compaction, restoration, and potential extra costs.
- Set clear expectations for communication, cleanup, and weather-related delays.
Table of Contents
- Why Planning Matters
- Walk the Property
- Utilities, Permits, and Rules
- Equipment Access and Work Zones
- Soil, Slope, and Grade
- Drainage Planning
- Project Sequence
- Comparing Quotes
- Questions to Ask
- Final Checklist
Excavation is not simply a matter of moving soil from one place to another. Whether you are preparing for a new driveway, repairing drainage, installing utilities, removing an old structure, or reshaping a yard, the work can affect foundations, landscaping, access routes, and water flow. Planning for comprehensive site preparation and excavation before equipment arrives helps homeowners avoid preventable delays and costly corrections.
A successful project starts with a clear understanding of the site. Ground conditions, underground utilities, local requirements, and the final drainage plan all influence the scope of work. Taking time to identify these factors early makes it easier to compare quotes, coordinate contractors, and protect the property.
Why Planning Matters Before Excavation
Small site mistakes can become large property problems. An equipment route that is too narrow may delay work, while a poorly planned slope can direct runoff toward a foundation, patio, or neighboring lot. Planning also clarifies who is responsible for permits, material delivery, debris removal, and final restoration.
Before approving a start date, establish the intended result. Is the goal a level building pad, a new drainage route, a utility trench, or a finished yard ready for sod? The answer affects the equipment, materials, labor, and amount of soil that may need to be moved or removed.
Material needs should be considered early as well. A reliable landscape and building materials supplier can help coordinate gravel, drainage aggregate, topsoil, base rock, mulch, or other products needed after excavation and rough grading are complete.
Walk the Property and Record Existing Conditions
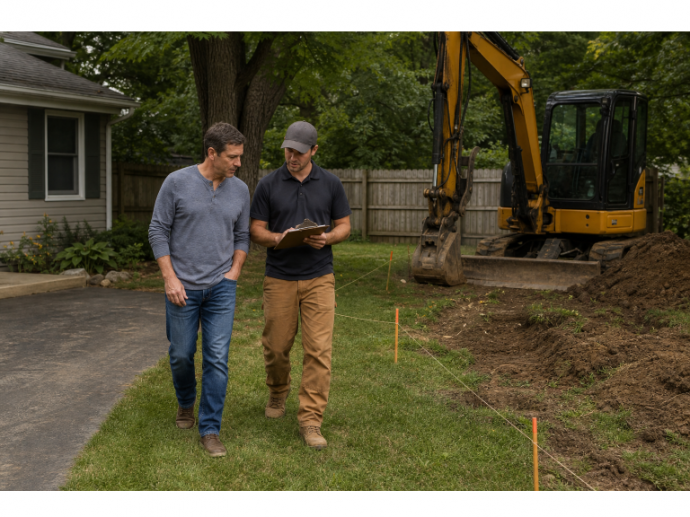
Complete a basic site walk before work begins. Take dated photos from multiple angles, make a rough sketch, and note features that must be protected. This record is useful for planning and for confirming the property's condition before trucks and machinery enter.
Items to Document
- Buildings, patios, sidewalks, fences, retaining walls, and driveways.
- Low spots, standing water, erosion, muddy areas, and drainage outlets.
- Trees, gardens, shrubs, utility boxes, and other features that will remain.
- Gate widths, narrow side yards, overhead wires, and turning areas.
- Visible property markers, easements, culverts, ditches, and downspouts.
A side yard may look accessible until a fence post, mature tree, air-conditioning unit, or utility pedestal reduces the actual clearance. Measurements are more dependable than assumptions when selecting equipment and planning an entry route.
Check Utilities, Permits, and Property Rules
Underground utilities must be addressed before digging begins. Homeowners should use 811 safe-digging guidance and confirm the required notice period for their state. Markings help identify public utility lines, but private lines, such as irrigation, outdoor lighting, propane, or some sewer connections, may require separate investigation.
Depending on the project, approvals may include building or demolition permits, septic authorization, right-of-way permission, erosion controls, or local grading requirements. Ask who will schedule inspections and who is responsible for closing permits after work is finished.
Plan Equipment Access and Work Zones
Excavators, skid steers, dump trucks, trailers, and material deliveries need adequate room to enter, turn, unload, and leave safely. Clear outdoor furniture, trailers, toys, and loose materials before the crew arrives. Identify a staging area for soil piles, gravel, debris, and equipment that will not block traffic or emergency access.
Protect surfaces that are not part of the work area. Discuss pavement protection, sidewalk crossings, landscaping boundaries, and fence removal or temporary protection. Wet weather matters too, because a route that supports equipment on dry ground may become rutted or unsafe after heavy rain.
Review Soil, Slope, and Grade
Soil conditions affect nearly every part of a ground-work project. Clay may drain slowly, loose fill can require compaction, rock can increase excavation time, and saturated soil may prevent equipment from operating efficiently. Buried concrete, stumps, construction debris, and unexpected groundwater can also change the plan.
Ask whether the project includes rough grading, finish grading, or both. Rough grading establishes the general shape needed for construction or drainage. Finish grading creates the final surface, supports proper runoff, and prepares the area for gravel, landscaping, seed, or sod.
Build Drainage Into the Work Plan
Drainage should be designed before the final grade is complete, not treated as an afterthought. The goal is to direct water away from structures and avoid creating a new problem downhill or across a property line. Solutions may include swales, catch basins, culverts, downspout extensions, French drains, surface channels, or stabilized outlets.
Consider where water currently collects, where it will flow after work is complete, and how exposed soil will be protected during construction. The Environmental Protection Agency provides useful information about stormwater discharges from construction activities, including the importance of erosion and sediment controls on disturbed sites.
Use the Right Order of Operations
- Confirm the scope, boundaries, and protected features.
- Mark utilities and secure required permits or approvals.
- Clear debris, vegetation, or structures included in the scope.
- Prepare access routes and temporary surface protections.
- Complete excavation, trenching, drainage, or utility installation.
- Backfill and compact areas as required.
- Perform rough grading, finish grading, stabilization, and cleanup.
The exact order can change because of weather, inspection timing, utility schedules, or hidden site conditions. The important point is that each phase supports the next one instead of requiring completed work to be reopened later.
Compare Project Quotes With Care
Do not compare proposals by total price alone. A lower bid may exclude hauling, disposal fees, imported fill, gravel, compaction, permit coordination, drainage components, or restoration. Request written assumptions and ask how unexpected rock, buried debris, unsuitable soil, or groundwater will be handled.
What a Detailed Quote Should Include
- Work areas, estimated quantities, labor, and equipment.
- Material delivery, soil removal, hauling, and disposal.
- Drainage or utility work, backfilling, and compaction.
- Cleanup, final grading, and restoration expectations.
- Possible extra charges and the approval process for changes.
Protect Nearby Areas and Neighbors
Excavation can affect more than the immediate work zone. Dust, noise, vibration, truck traffic, and temporary drainage changes may impact adjacent homes or shared access points. Before work starts, tell nearby residents when equipment is expected, where trucks will travel, and whom to contact with concerns. Confirm fence lines and shared driveways before moving materials. Cover or relocate delicate plants, mark irrigation heads, and protect outdoor mechanical equipment from soil and debris. If work occurs near an existing foundation, ask the contractor how vibration, clearance, and soil removal will be managed. This prevents neighbor disputes.
Addressing soil movement or damage to existing foundations is a critical aspect of any construction or landscaping project near an established structure. These issues can manifest as cracks in walls, uneven floors, or doors that no longer close properly, indicating a need for professional assessment. Understanding the options available for foundation repair helps in planning for the stability and longevity of a property. Such interventions often involve methods like pier and beam adjustments, slab jacking, or installing helical piers to restore structural integrity.
Plan for Soil Storage and Disposal
Excavated soil can take up more space than expected, especially when it is loose or wet. Decide before work begins whether suitable material will stay on site for backfill or grading, be stockpiled for later landscaping, or be hauled away. Select a storage area that does not block drainage paths, driveways, sightlines, or utility access. Keep piles away from steep edges, drainage inlets, and tree roots. If fill will be imported, clarify its type, delivery timing, placement location, and whether it needs testing or compaction. Knowing where every load will go prevents double handling.
Prepare for Weather and Site Stabilization
Weather can change excavation conditions quickly. Rain may soften access routes, fill trenches, create runoff, and make compaction difficult. Dry, windy conditions can produce dust and expose loose soil to erosion. Discuss the contractor's weather plan before scheduling begins. It should address when work will pause, how open trenches will be secured, and how soil piles and exposed slopes will be protected. Keep temporary drainage features clear and do not allow sediment to wash into streets, storm drains, or neighboring properties. After major weather events, inspect the site for rutting, erosion, ponding, or damage.
Document Completion and Maintain Results
Before the crew leaves, walk the completed area with the project lead. Compare the result with the agreed scope and note any remaining tasks, such as removing excess material, repairing disturbed areas, or adjusting final grades. Ask for photos of installed drainage components or utility trenches before they are covered, particularly if those records may help with future maintenance or renovations. Keep copies of permits, inspections, invoices, material tickets, and change approvals in one project file. Once landscaping is installed, continue to observe how water moves across the property during ordinary rain. Address settlement promptly.
Questions to Ask Before Work Begins
- What will happen on the first day, and where will equipment enter?
- How will pavement, landscaping, and nearby structures be protected?
- Where will excess soil and debris go?
- What happens if rock, water, or buried materials are found?
- How will runoff be controlled during the project?
- Who will communicate schedule changes or added costs?
Final Checklist for a Smoother Project
Successful excavation begins before the first bucket of soil is lifted. Walk the site, take photos, mark protected features, confirm utilities, check local requirements, plan equipment access, and discuss drainage and disposal in detail. Finally, review the quote line by line and agree on communication and cleanup expectations. A well-planned project is easier to schedule, easier to budget, and more likely to produce durable results.
Comments
