Categories more
- Adventures (117)
- Arts / Collectables (50)
- Automotive (110)
- Aviation (123)
- Bath, Body, & Health (275)
- Children (63)
- Cigars / Spirits (129)
- Cuisine (229)
- Design/Architecture (98)
- Electronics (98)
- Entertainment (56)
- Event Planning (144)
- Fashion (186)
- Finance (19)
- Gifts / Misc (54)
- Home Decor (224)
- Jewelry (153)
- Pets (34)
- Philanthropy (7)
- Real Estate (125)
- Services (79)
- Sports / Golf (58)
- Vacation / Travel (505)
- Watches / Pens (108)
- Wines / Vines (260)
- Yachting / Boating (143)



Bezel or Claws? How to Frame an Emerald-Cut Diamond

Published
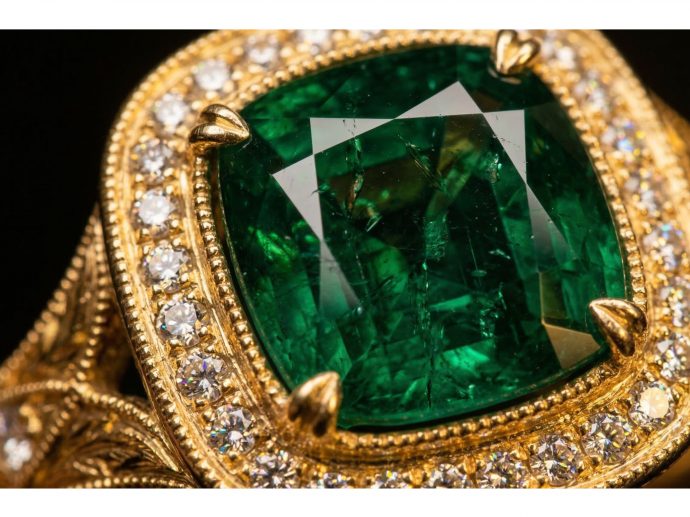
10/13/2026Two emerald-cut diamond rings can have similar proportions and quite different personalities. In one, small claws, also called prongs, interrupt the outline at the corners. In the other, a polished rim runs around the stone, making the metal part of the picture.
That is the central choice between a claw setting and a full bezel: how much of a frame you want to see. Claws leave more of the diamond’s edge exposed; a bezel surrounds it. Both can create a restrained solitaire, but the details become particularly noticeable around an emerald cut’s long sides and clipped corners.
Follow the outline around the corners
Look first at the short diagonal edges that turn an emerald cut from a rectangle into an eight-sided shape. With claws, notice how much of each corner remains visible and whether the tips look rounded or tapered. Small changes here can make the setting feel delicate or more pronounced.
A bezel draws a continuous line around those corners. For an emerald-cut diamond style with this metal border, Lily Arkwright’s collection includes the Margot lab-grown diamond bezel solitaire in platinum.
Within either style, examine the finish. Does the rim follow the corners neatly? Do the claw tips look balanced when viewed straight on? These are useful details to discuss with a jeweller, particularly when a photograph leaves you unsure whether you are seeing an intentional feature or simply an awkward angle.
Separate the diamond’s size from its frame
An 8 × 6mm diamond does not tell you the dimensions of the finished setting. A bezel adds metal around the edge, while claws project at particular points. Ask for the complete setting’s length and width as well as the stone’s measurements.
When comparing Lily Arkwright’s rings set with lab grown diamonds, keep the metal, diamond dimensions and band widths similar. Otherwise, a broader band or warmer metal colour may account for much of the difference you notice. A yellow-gold rim, for example, makes the border a more obvious colour feature around a near-colourless diamond.
When browsing photographs, check the centre-stone size shown and look for an ordinary on-hand view. A tightly cropped image can make a fine rim look substantial. The question is whether you enjoy that border at the distance from which you normally see your hand.
Watch the diamond as well as the metal
Emerald cuts have long, rectangular facets arranged in concentric rows, as GIA’s emerald-cut guide explains. Ask to see the actual diamond move slowly in consistent lighting. Follow the changing reflections across its stepped facets, then look separately at the highlights on the metal border.
If two rings contain different stones, their appearance cannot tell you what changing the setting alone would do. Choose the diamond and its frame together, without assuming the setting name guarantees the result.
Turn the ring sideways
The view from above will not tell you how far the setting projects above your finger. Ask for a side view, then try the ring while bending your fingers and reaching into a pocket. A smooth outline can still belong to a substantial setting.
GIA’s settings guide explains that a bezel protects the stone’s perimeter and its smooth edges are less likely to catch on clothing. Claws offer a more open view, but need inspection to ensure they remain secure. A bezel also needs appropriate care; ask the jeweller what checks suit the particular ring.
Leave room for the wedding band
If you plan to wear both rings together, try the pairing before deciding. The structure beneath the diamond determines where a second band can sit. Ask the jeweller to check any contact between the rings, and compare a straight band with a shaped option if needed.
Then return to the view that first caught your attention. Choose claws if you enjoy seeing more of the diamond’s edge between small metal accents. Choose a bezel if the continuous outline is part of
Comments
